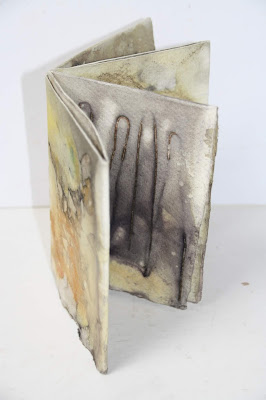
Did you think I would get to six Creative Sunday Prompts? I certainly did not, we do live in extraordinary times. Thank you to everyone who has given me feed back and posted their pieces inspired by these posts. I do realise that it is difficult to concentrate at present, but these posts will be here for when you feel like trying a few of the techniques out.
I thought now would be a good time to make up some of the eco printed and developed paper into some simple book forms. Of course you can try these ideas with fabric...but I am doing other things with those and will show and tell later. For some of you this post will be a reminder of what you already know.
I do like a simple 'no sew' book form that is sympathetic to my inability to be accurate. I tend to bash on and do not let the paper grain concern me, or the straightness of an edge to be frank. I can hear a gasp from all the real book makers out there.
I am going to show you a tab and a slit book using some of the paper printed and painted in earlier prompts.
Lets look at the Tab Book first.
I have folded this sheet into 8 and then ripped it into 4 sheets with a fold in the middle of each.
It is harder to fold these books accurately if you have collaged onto the pages first, it makes extra bulk to go round folds. But as I do not allow accuracy to get in the way of my book making use what comes to hand.
With the fold against a straight line on my cutting board and using the grid I just trim the right hand edge straight
on each of the 4 sheets.
Choose the page you want for the front of your booklet. These measurements are on the inside for 2 tabs. The exact numbers will vary depending on the proportion of your book and the size of tabs you want to make. From the fold cut out each tab...the tab should remain fixed to the fold.
Take each folded sheet that will form the inside of your book and with the cut edge level with the cut edge, mark on each fold where the top and bottom tab will slip into the sheet.
There should be a slit made top and bottom the width of each tab so the tab will push through.
Then slip each tab into the slits, threading each page onto the cover.
Here are the tabs threaded through.
I have glued my tabs down to keep the book firm.
One tab glued to the left, one to the right.
Then I trimmed the other edge of the book leaving
The front edge looking rustic.
I often like the soft marks left on the back of eco printed paper and this book form shows that off nicely.
Now for a slit book, exactly what it says it is. Fold the paper into 8.
Cut a slit in the center of the sheet. Extend the slip beyond the folds by a millimetre, this will make it more accurate when folding into shape.
Fold the paper in half pushing out the cut pages reversing the folds.
Miraculously this creates a very simple booklet.
Try this out with fabric and stitch or glue pages together.
I am by no means a book maker, but I do like looking at my eco prints when they are folded up in this way.
These booklets are crying out to be worked into again and I would recommend you have a look at Under the Oaks Creativity for some extra ideas.
Make journals, shopping list /note books or sketch books. Think how impressive it would be to receive one as a gift...yes start making Christmas presents now!
I would love to see what you come up with, if you do post your results on Instagram please tag @sb.brown21 and I will see what you are getting up to.
Have the best creative week you can.


1 comment:
Nice image
Post a Comment